Installation Guide
- Tracy Yang
Distribution VM
To get started with Atrium Release 2015/A, download the distribution VM (Atrium_2015_A.ova) from here: size ~ 2GB
https://www.dropbox.com/s/vw7k5y2vkhfytgx/Atrium_2015_A.ova?dl=0
login: admin
password: bgprouter
NOTE: This distribution VM is NOT meant for development. The only purpose is to help get a working system up and running for testing and deployment as painlessly as possible. A developer guide using mechanisms other than this VM will be available shortly after the release.
The VM can be run on any desktop, laptop, or server with virtualization software (VirtualBox, Parallels, VMWare Fusion, VMWare Player, etc.). We recommend using VirtualBox for non-server uses. For running on a server, see the subsection below.
Get a recent version of VirtualBox to import and run the VM. We recommend the following:
1) using 2 cores and at least 4GB of RAM.
2) For networking, user can "Disable" the 2nd Network Adapter. We only need the 1st network adapter for this release.
3) User could choose the primary networking interface (Adapter 1) for the VM to be NATed or "bridged". If choosing to NAT, user would need to create the following port-forwarding rules. The first rule allows user to ssh into user's VM with a command from a Linux or MAC terminal like the one below:
$ ssh -X -p 3022 admin@localhost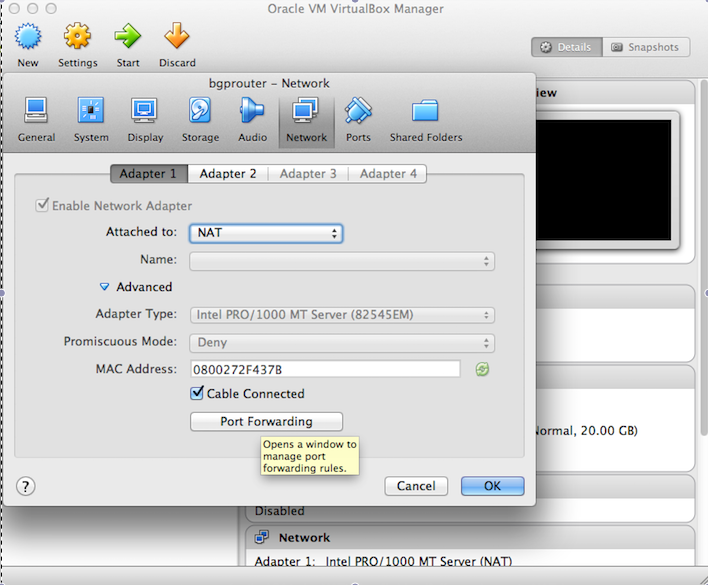

The second rule allows user to connect an external switch to the controller running within the VM (the guest-machine) using the IP address of the host-machine (in the example its 10.1.9.140) on the host-port 6633.
If choosing to bridge (with DHCP) instead of NAT, user should login to the VM to see what IP address was assigned by user's DHCP server (on the eth0 interface). Then, user should use ssh to get in to the VM from a terminal:
$ ssh -X admin@<assigned-ip-addr>User can login to the VM with the following credentials --> login: admin, password: bgprouter
Once in, user should try to ping the outside world as a sanity check (ping www.cnn.com).
Running the Distribution VM on a Server
The Atrium_2015_A.ova file is simply a tar file containing the disk image (vmdk file) and some configuration (ovf file). Most server virtualization softwares can directly run the vmdk file. However, most people prefer to run qcow2 format in servers. First, untar the ova file
$ tar xvf Atrium_2015_A.ovaUse the following command to convert the vmdk file to qcow2. Then, the virtualization software can be used to create a VM using gcow2 image.
$ qemu-img convert -f vmdk Atrium_2015_A-disk1.vmdk -O qcow2 Atrium_2015_A-disk1.qcow2Running the Distribution VM on the Switch
While it should be possible to run the controller and other software that is part of the distribution VM directly on the switch CPU in a linux based switch OS, it is not recommended. This VM has not been optimized for such an installation, and it has not been tested in such a configuration.
Installation Steps
Once user has the VM up and running, the following steps will help bring up the system.
User has two choices:
A) Bring up the Atrium Router completely in software and completely self-contained in this VM. In addition, a complete test infrastructure (other routers to peer with, hosts to ping from, etc.) that can be played with (via the router-test.py script) will be provided. Note that when using this setup, software switches emulate hardware pipelines. Head over to the "Running Manual Tests" section on the Test Infrastruture page.
B) Bring up the Atrium Router in hardware, working with one of the seven OpenFlow switches Pica8 has certified to work for Project Atrium. Follow the directions below:
Basically, user needs to configure the controller/app, bring up Quagga, connect it to ONOS (via the router-deploy.py script), and configure the switch that is being worked on to connect it to the controller. The following pages will help with that:
Copyright © 2025 Pica8 Inc. All Rights Reserved.